More photos from the renovation of a 1721 house

As a follow-up to yesterday’s post, I took some more photos this morning of the renovation of First Parish in Cohasset’s 1721 Parish House. No more surprises today. The cladding that was removed yesterday — 5/4 pine milled to mimic stone — is associated with Colonial Revival, an architectural style of the mid- to late nineteenth century. So the appearance we had become accustomed to was really a nineteenth century invention.

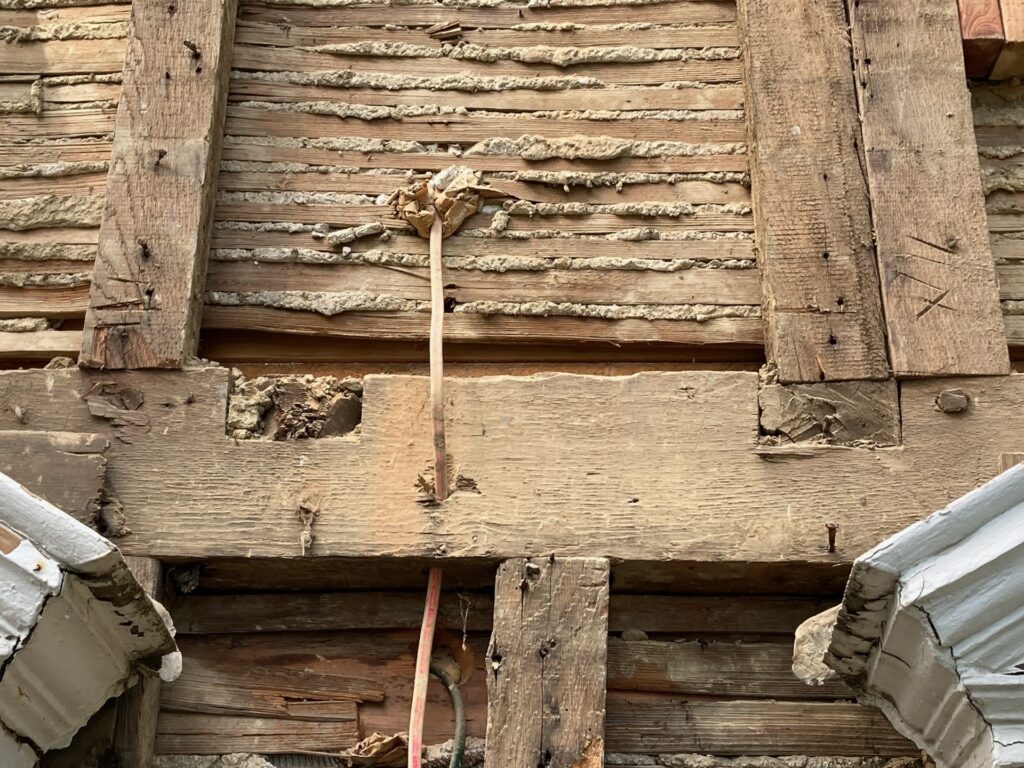
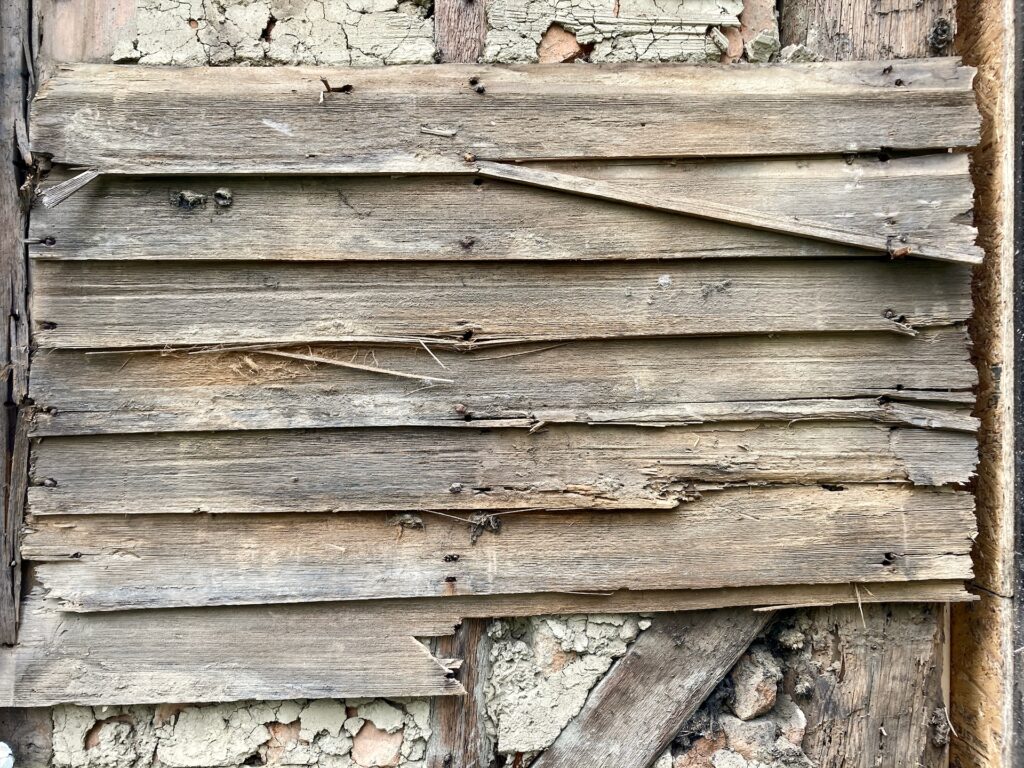
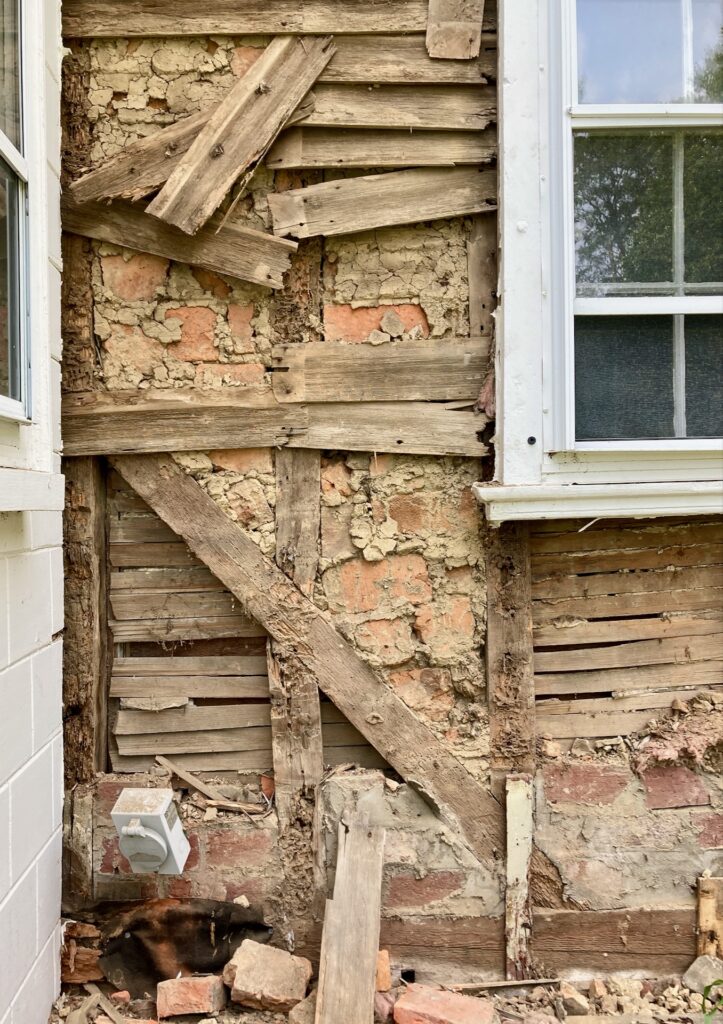
By this morning, the original framing was clearly revealed. The framing is beautiful in its own right. Here are some photos:
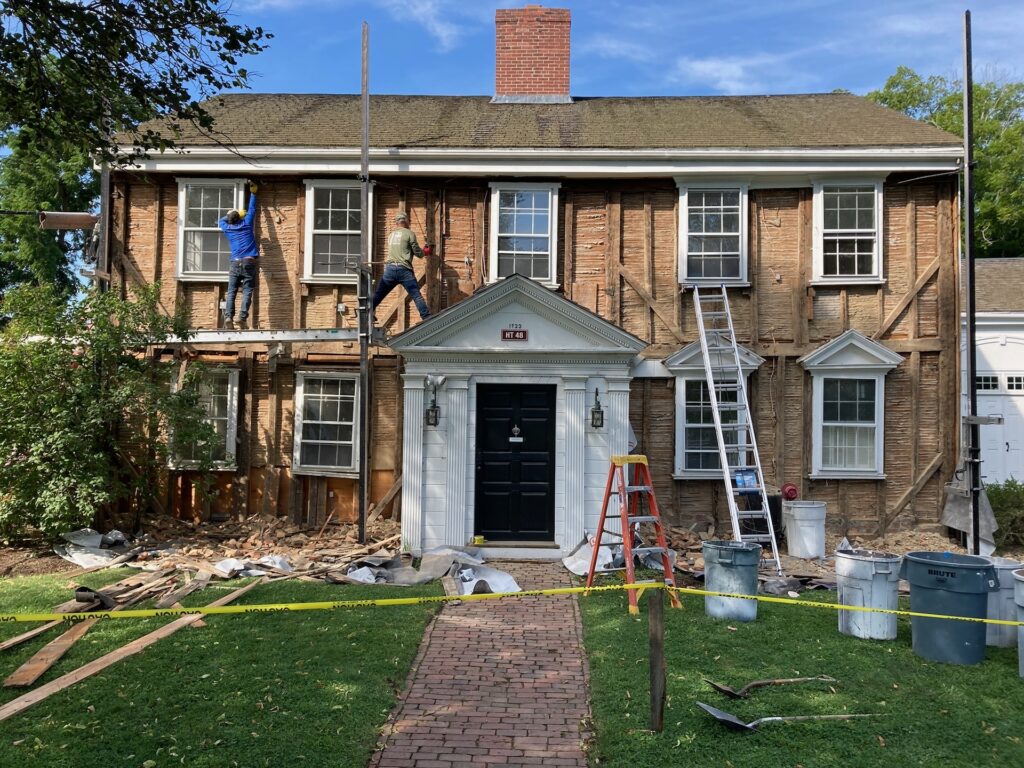
House with siding removed, which exposes the old timber framing
With the clapboards and nogging removed, the framing is clearly visible
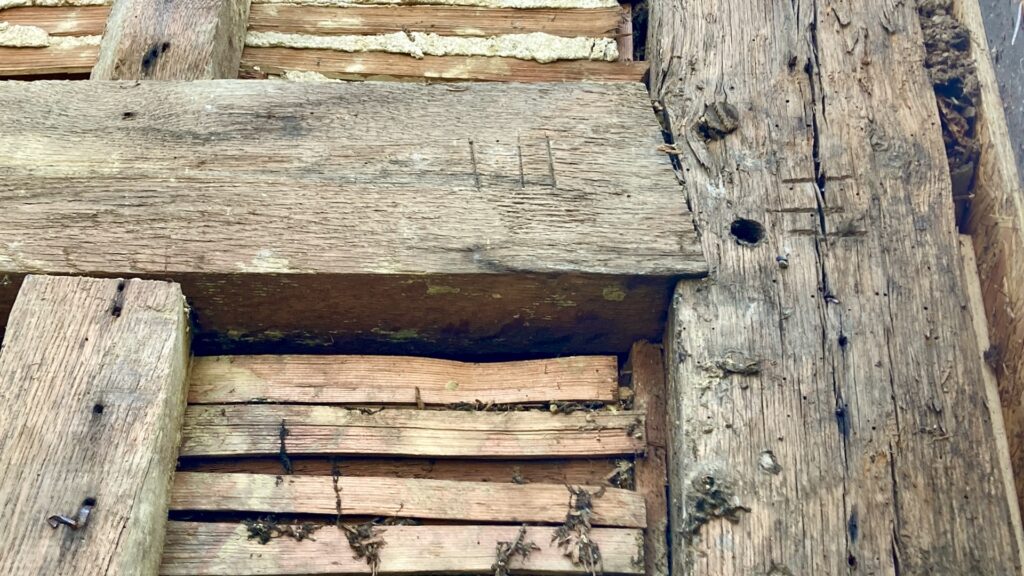
Close up photo of framing
Joint between the girt and the post at the northeast corner of the house — you can see a treenail (or trunnel) and other details of the framing
Close up of framing
The girt with second floor joists and wall studs

It’s fun to speculate what the front facade of the building looked like in 1721. Based on what we’ve seen so far, and based on what would have been typical of that era, I’m guessing that the windows had smaller panes, and were somewhat differently proportioned (in my imagination, the second floor windows were double hung windows with 9 over 9 sash, and the first floor windows were 12 over 9). There were no pediments over the windows. The cladding was thin graceful clapboards, perhaps with no paint, nailed on with forged nails that had large heads. There were probably no corner boards, and it’s unlikely there was a front vestibule. All of the wood used to construct the house was cut from local trees, and the brick-and-mortar noggin was also of local manufacture. The glass would have been hand-blown, and therefore slightly wavy.

All this raises the difficult question of how we should restore historic buildings. Even if we knew exactly what the building looked like (and we can’t be sure), First Parish does not have the budget to purchase authentic windows with hand-blown glass and hand-made sash and frame. Nor would such windows be energy-efficient. I suspect the neighbors would not like it if we left the facade unpainted; white paint is de rigueur in New England historic districts. Even if unpainted clapboards were acceptable, we would not be able to find old-growth Eastern White Pine, and something like unpainted Western Red Cedar would look wrong. I suspect we would also receive pushback if we had no corner boards (plus, we would have to change the siding around each corner to match, which would add even more to the expense).

In my experience, historic renovation is always a compromise between historically informed research and current aesthetic standards, between practicality and community standards, between what would be nice or best and what the building owner can actually afford. The best way to reach an appropriate compromise is through community review (i.e., going through the Historic District Commission), accompanied by good-faith efforts on the part of the owner of the building.

Renovating a 1721 building, and what we found

We’re completing the final stage of renovations on our historic buildings. The renovation began in 2021 with extensive repairs to the 1747 Meeting House. Now we’re working on repairing the crumbling facade of the Parish House, which was built in 1721 by Nehemiah Hobart, the first minister of First Parish. The Livingstone Company arrived today to begin work.

And we ran into a big surprise.

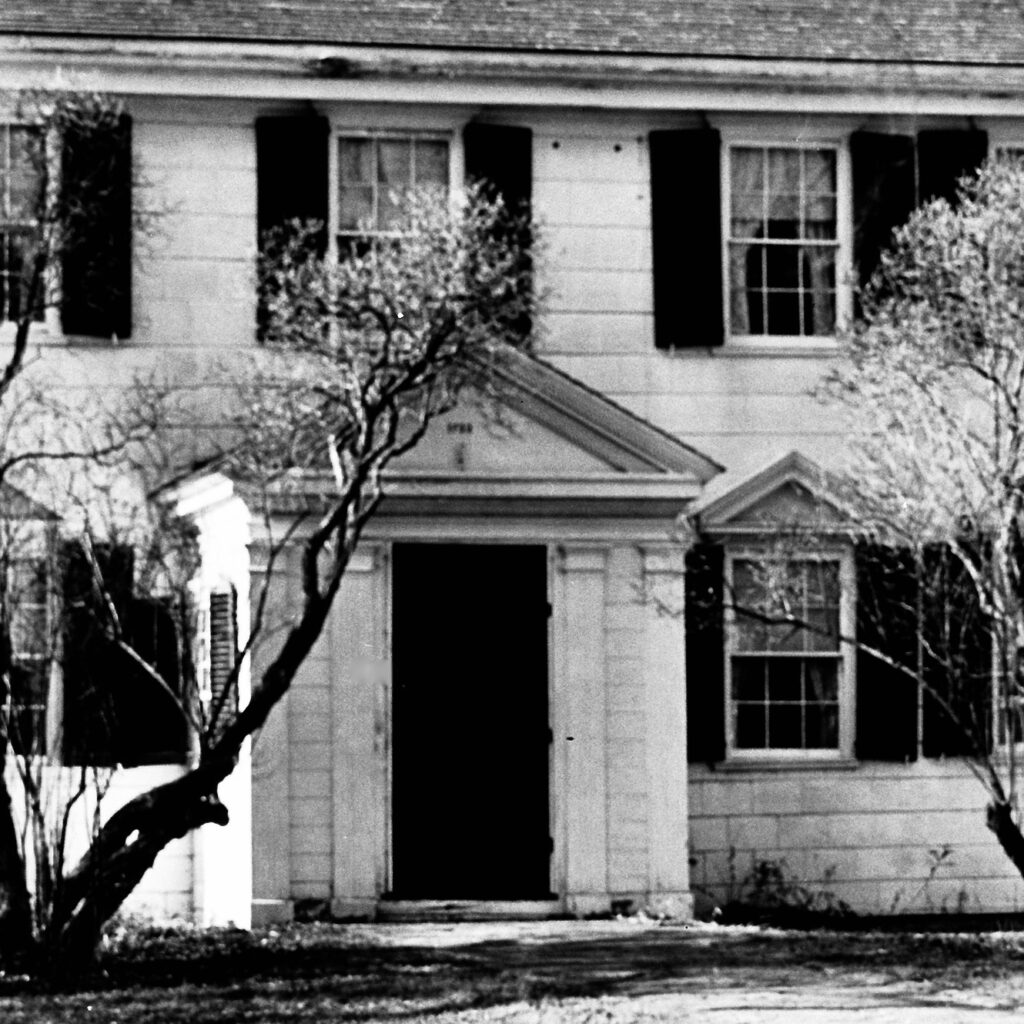
The front facade was wood milled to resemble masonry blocks. Here’s a 1936 photo showing the facade (click on any photo to see a larger image):

Detail from an old photo
1936 Historic American Building Survey photo of the 1721 Nehemiah Hobart House in Cohasset

But there was something completely different underneath that.

Under the existing cladding, we found old clapboards. So the front facade was originally covered with clapboards!

Not only that, but the clapboards that were uncovered may be the original 1721 clapboards. They’re attached to the house with what may be hand-made cut nails with forged heads. Each clapboard is about three and a half feet long, and the butt ends are feathered where they overlap. The outer faces of these old clapboards are well weathered, and it appears that they were never painted. [Update, 8/22: A neighbor stopped by who has a graduate degree in historic architecture. He believes the clapboards are pre-Revolutionary War, but later than 1721. He believes they’re from the 1760s.]

Here are some photos to show you what we found:

The front of the Parish House with the old clapboards revealed
The front of the Parish House showing the remaining original clapboards
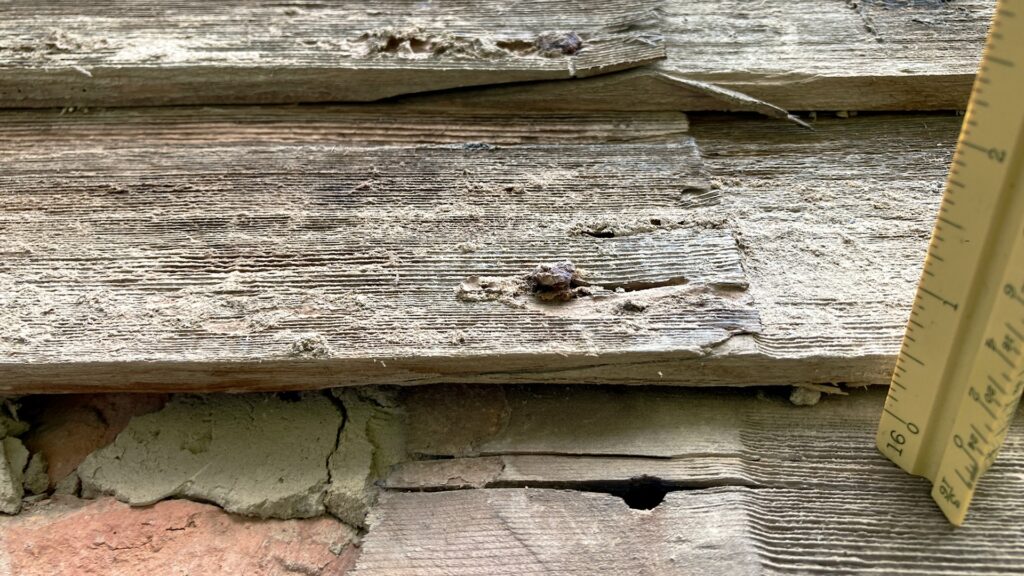
Close-up of clapboards
Detail showing how the butt ends of the clapboards are carefully overlapped

There were some more surprises.

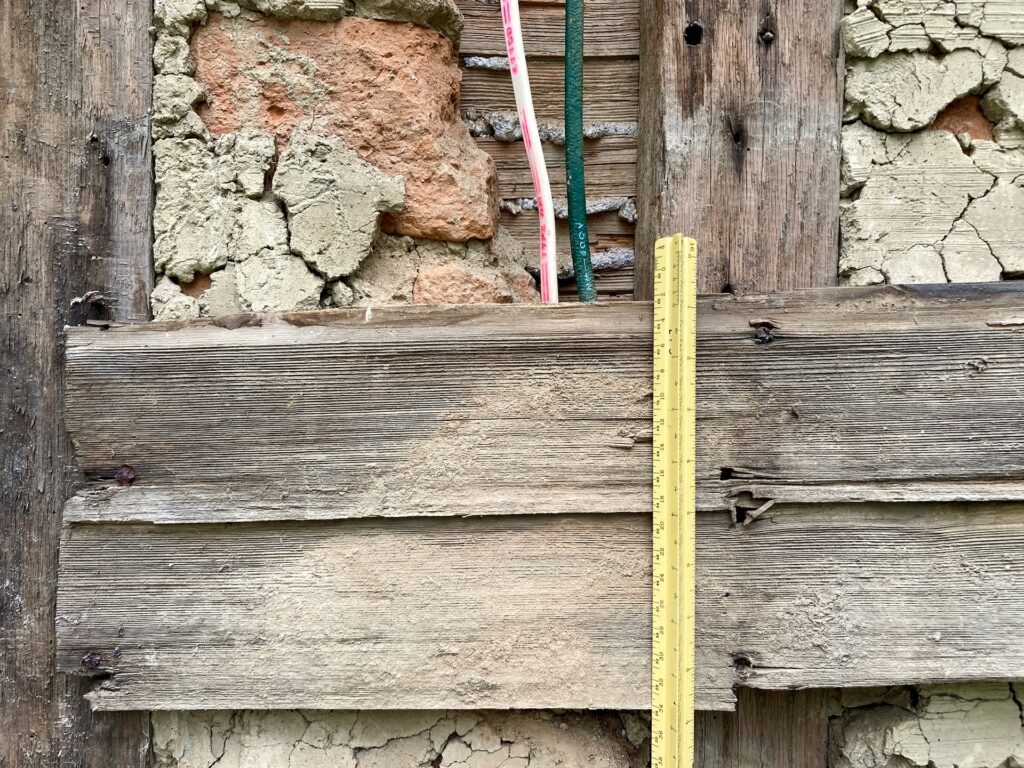
Under the clapboards, the spaces between the frame of the house were filled with old brick and mortar (called “nogging”). Some of the bricks appear to be quite old — not the modern water-struck brick, but irregular bricks that may have been hand-made. This apparently served as insulation and/or fireproofing for the house.

Close-up of clapboards with ruler to show size
The old clapboards nailed to the house frame, with bricks and mortar under the clapboards — you can also see the back side of the lath and plaster of the inside the house

And there were still more surprises in store.

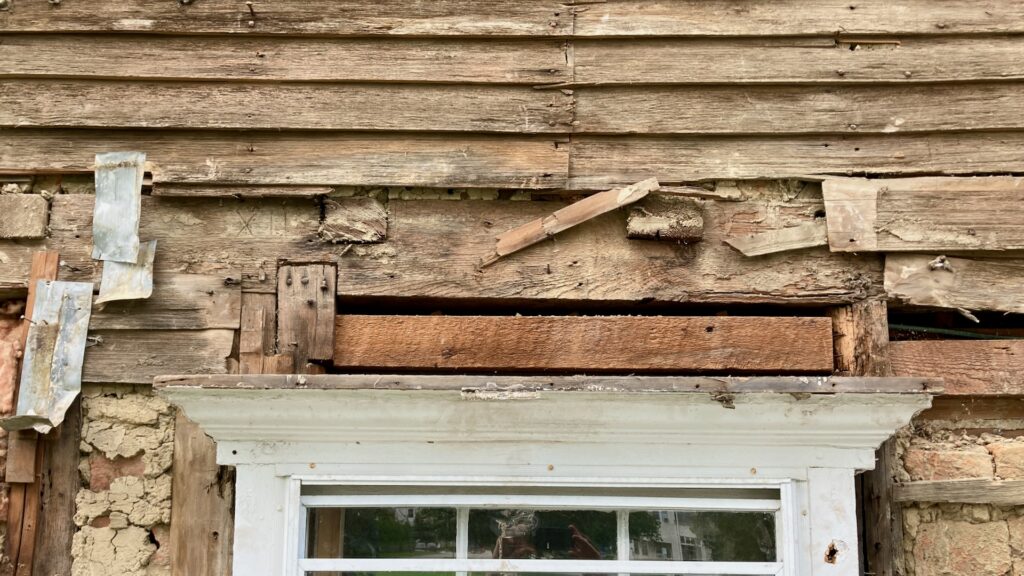
When the triangular pediments over the first floor windows were removed, it appears that the original opening was for taller windows. We were pretty sure that the windows on the front facade were not original (the sash appear to date from the nineteenth century), and this may confirm that supposition.

You could also see where the ends of the floor joists for the second floor were mortised into the girt or cross-wise beam. Notice how the original window frame apparently went right up to the girt, and the opening has been blocked in with a piece of lumber that is machine sawn, not hand hewn. This means the original first floor windows were probably significantly taller than the existing ones. And you can see a builder’s mark, “XII,” which would have indicated which beam went with which post when erecting the finished posts and beams.

Close-up of framing and clapboards over a window
Above the window just to the left of the front door — the builder’s mark is chiseled into the girt above the left edge of the window

We’re now in the process of consulting with the Cohasset Historic District Commission. We received a permit from them based on replacing wood milled to mimic stone. But it’s now clear that this was a much later addition to the building. (I’m guessing it was added at least a hundred years after the house was built, i.e., in the nineteenth century.)

In any case, it has been an exciting day today, as we learned a lot more about our historic 1721 Parish House.

I’ll include a couple more photos below, for those who can’t get enough of historic buildings.

Click to read the follow-up post….

Close-up photo of some of the clapboards
A section of the clapboards
Corner bracing near the front door

Crossposted.

Ecojustice Camp comes to Cohasset

I teamed up with Ngoc Dupont and Matt Mulder, two professional educators, to bring the Ecojustice Camp concept to the South Shore of Boston last week. We didn’t have the best of weather for the camp, with rain showers almost every day, and a tornado alert for early Friday morning. The tornado alert meant that we didn’t camp at Wompatuck State Park, but instead camped at the Parish House of First Parish (where there was a full basement we could retreat to if necessary). Yet in spite of the weather, we had a blast.

We’ve posted photos from the past week on the camp website. Since we only have permission to post photos from camp on that website, you’ll have to click here to see them. The photos will give you an idea of the range of camp activities — from cooking outdoors, to whittling, to ecology simulation games, and more.

Natural dyes: pine cones

Carol and I are still investigating natural dyes. At the moment, we’re looking for dyes that (a) we can use with kids, (b) will work well for tie-dyeing cotton t-shirts, (c) are in season right now and can be easily collected by kids, and finally (d) are plentiful (i.e., we’re not going to collect endangered lichens to use as dyestuffs).

It looks like the most promising dyestuff for our purposes is going to be pine cones. They’re in season and plentiful, readily available, produce a pleasing pinkish-brown color, and I found someone who did tie-dye with them.

Carol and I went and collected some pine cones today (on land where we had permission to collect). The recipe for the dye bath says to soak the pine cones for 48 hours (see the recipe below); I’ve got some pine cones soaking now. But because I’m impatient, I also boiled some for a couple of hours this evening, even though this will probably produce a dye bath that makes a less intense color.

Stay tuned for updates on our natural dyeing experiment.

Update, 12 Sept: Follow up post here.

Update, 8 Aug.: I followed the recipe below fairly closely. The cloth emerged from the dyebath a pleasing light tan-yellow color. But nearly all the color came out in the first washing, so that now we have a very light tan-yellow. N.B.: In her book Craft of the Dyer: Colour from Plants and Lichens (Univ. of Toronto, 1980), Karen Leigh Casselman says she got a “warm tan” color from pine cones with “good colorfastness,” but she used alum and chrome mordant; I suspect, too, that she used this dyestuff with wool, not cotton.

We were not encouraged with our experience using pine cones for dyeing cotton. It’s too bad, because where live it’s easy to find plenty of pine cones. We probably would have gotten better results with a chrome mordant, but we don’t want to use chrome with kids because of the toxicity.

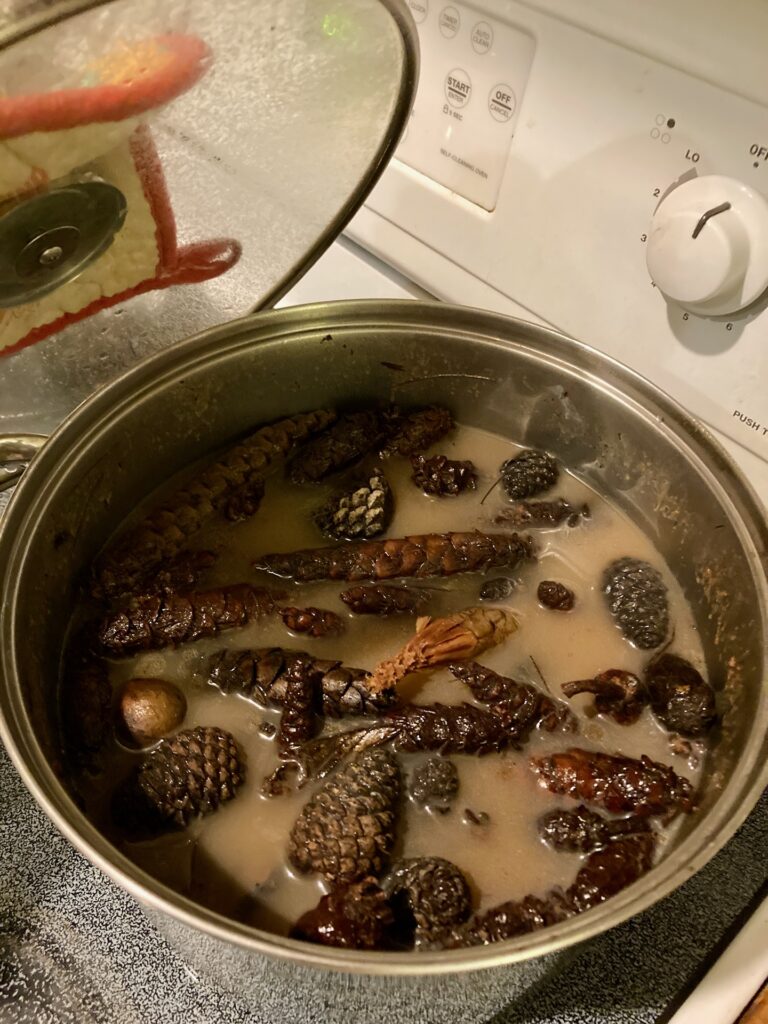
A pot containing pine cones in water, simmering on a stoe top.
The simmering dye bath
Continue reading “Natural dyes: pine cones”

Natural dyes from invasives

I’ve been researching natural dyes for textiles, and got interested in the possibility of using invasive species to make dyes. After all, if you’re going to pull up the plants anyway, why not do something with them? Here’s a list of invasive plants in Massachusetts, and also a list of plants likely to be invasive.

I’m still in the research phase, and haven’t actually tried any of these myself. Many of these appear to be recipes for dyeing wool yarn. Nevertheless, here are some possibilities I found:

Other non-native species that can be used for dyeing:

Unfortunately, much of the material I found online is not entirely useful. Some of the webpages linked to above just say that the plant can be used as a dye, but with no indication of mordants, length of time in dye bath, color-fastness, etc. And many of those dyeing are only interested in dyeing wool yarns, while I’m more interested in tie-dye projects for kids (here’s info on mordants for cellulose, e.g. cotton, fibers). Anyway, I’m planning to do some invasive species dyeing myself, and if I do I’ll give some more details.

Joe-pye Weed

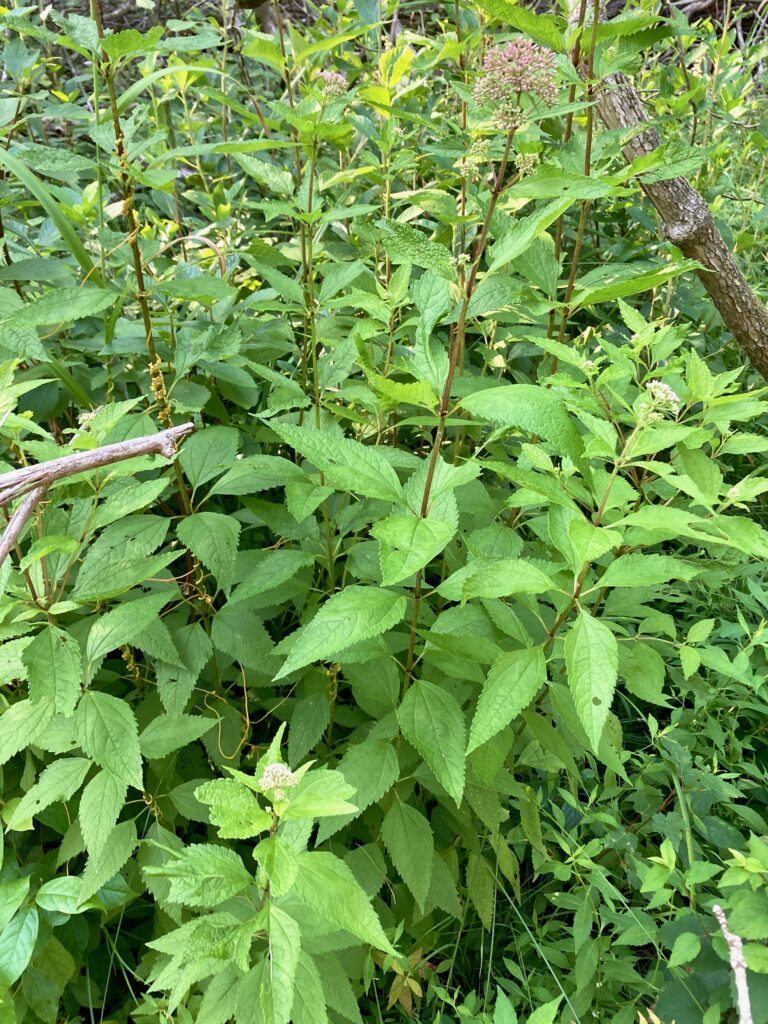
Perhaps my favorite fall flower is Joe-pye weed (Eutrochium spp.). There’s something about the color of the flowers and the color of the foliage that gets me, I don’t know why. I often have a strong emotional response to certain colors, and when sunlight catches the dull purple of Joe-pye Weed, I can feel it in my chest. I have no idea why this is so, I just know that it happens.

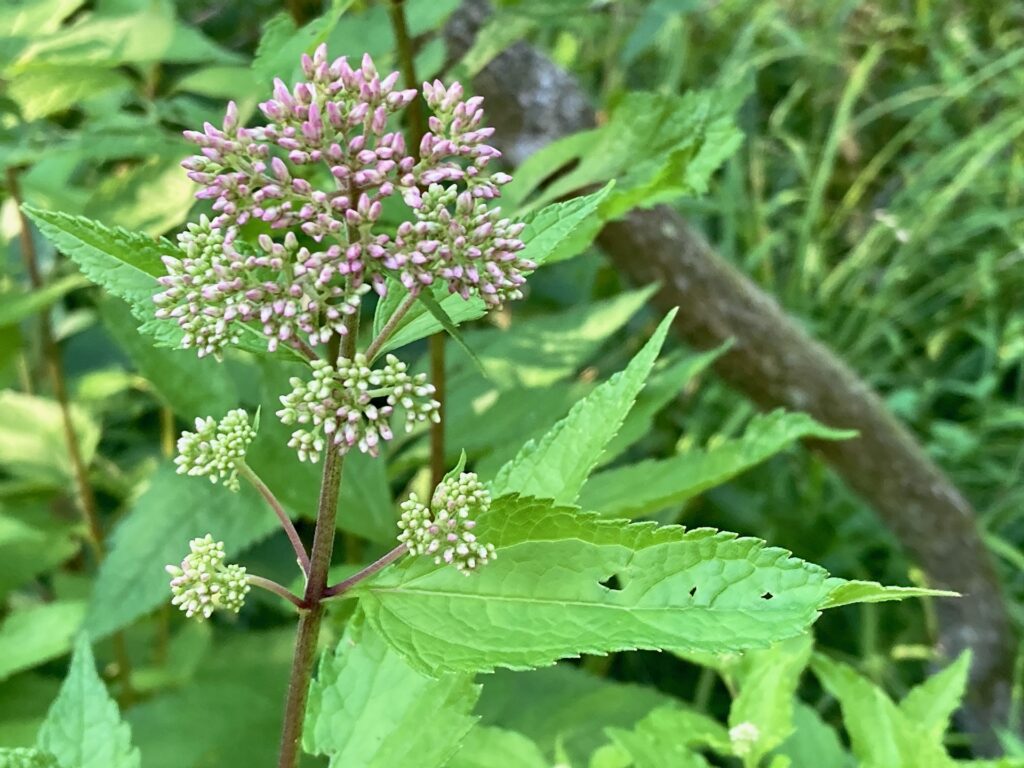
On a walk this afternoon, I came upon some Joe-pye Weed nest to a rushing stream in the Whitney-Thayer Woods in Cohasset. About a hundred feet of the trail, near one of the crossings of Brass Kettle Brook, was flooded from the torrential rains we had last week. I was teetering along on logs and stones that someone had conveniently placed alongside the trail, when there it was by the side of the trail: those dull purple buds almost ready to burst into bloom.

A capitulesence of Joe-pye Weed showing purple buds, but as yet no blossoms

I’ve been trying to figure out which species of Joe-pye weed this was. I think it’s Coastal Plain Joe-pye Weed (Eutrochium dubium), but I admit that I get confused by the online dichotomous key of the Native Plant Trust (—are the leaf blades triple-veined? —are the stems spotted or streaked with anthocyanin? —what exactly is the shape of the capitulescence?). Admittedly, I didn’t try as hard as I might to figure it out, since the dichotomous key tells me that E. dubium is “difficult to distinguish from related species.” Nor do I really need to know exactly which species of Joe-pye Weed it is — they all have similar flowers which evoke the same emotional response in me.

Coral fungus

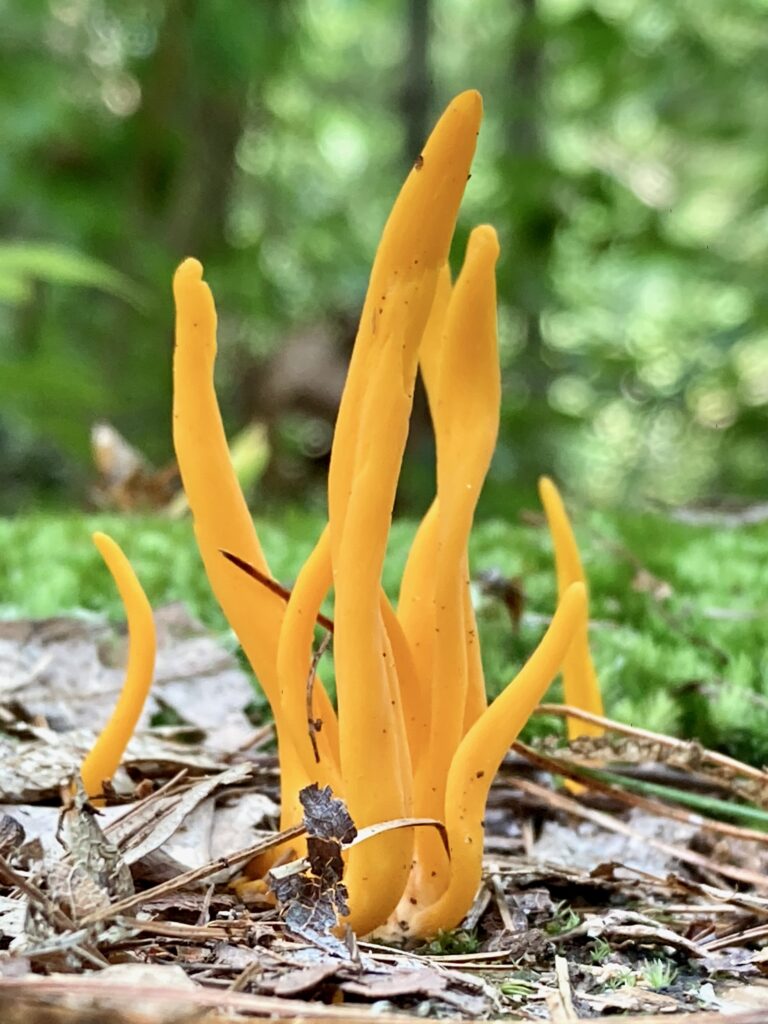
I almost stepped on this small fungus — it was maybe two and a half inches tall — when I was out for a walk today. I’m not competent to identify it, but between my field guides and iNaturalist, I’m thinking it’s a coral fungus in genus Clavulinopsis. Not that I’m particularly anxious to learn what species it is. I’m more interested in its weird beauty: delicate little sculptural forms rising up out of the woodland litter.

Coral fungus, perhaps genus Clavulinopsis

Declaration of Independence reading

According to tradition, Rev. John Brown, the minister in Cohasset during the Revolutionary War period, gave a stirring reading of the Declaration of Independence from the pulpit of the meeting house to the gathered townspeople not long after July 4, 1776.

I haven’t been able to find out the exact date when Brown read the Declaration to the people of Cohasset. But the Boston Gazette and Country Journal printed the complete Declaration of Independence on July 22, 1776. John Brown had a copy of that printing, and his copy (with his signature) still exists; it was auctioned by Christie’s in 2003. Since Cohasset was a port town, it seems likely that Brown would have received the newspaper by Sunday, July 28. That may be the date on which John Brown read the Declaration of Independence to the town, when people gathered for Sunday worship.

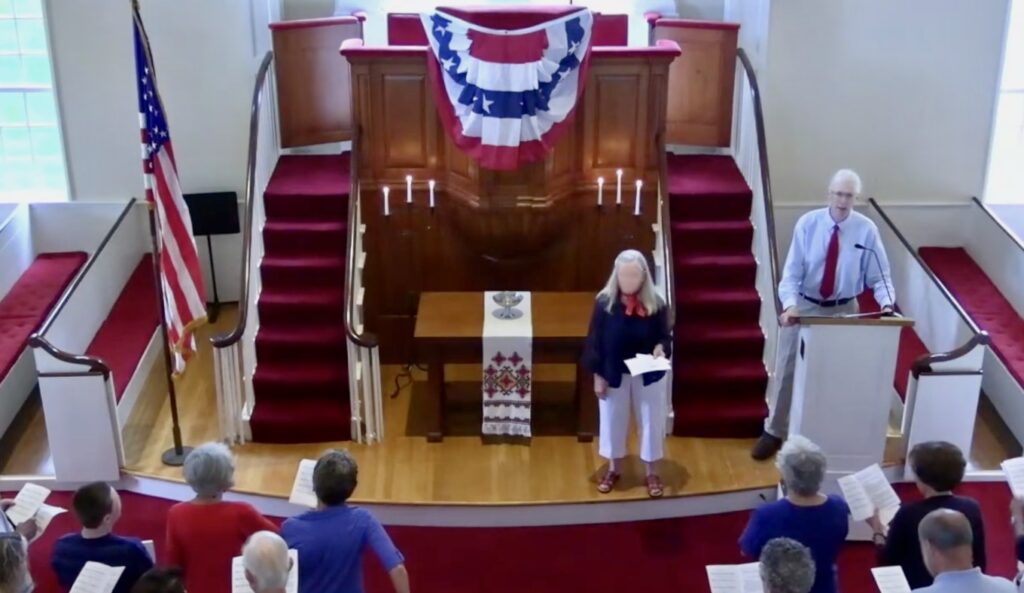
We decided to commemorate the first reading of the Declaration of Independence to Cohasset townsfolk on Independence Day weekend. So we held our reading on July 2 — not historically accurate, but this wasn’t a re-enactment of the original. Instead of having one person read the whole Declaration, in true democratic fashion we had ten readers, beginning with a 12 year old from our Sunday school.

Fifty people showed up, many more than our usual 15-20 people for summer services. This was a true community event, and somewhere between a third and half of those present were not part of our congregation. Our 1747 Meeting House was originally built by the town, and we feel we hold it in trust for the whole town. So we made this a truly non-sectarian commemoration, with no over Unitarian Universalist content.

We had people across the political spectrum, all of whom gathered together to honor the highest ideals of American democracy. It was a surprisingly moving event. We plan to do it again next year.

Two people standing in front of the high pulpit of the Cohasset Meeting House, with others in pews in front of them, all singing.
Singing “This Land Is Your Land” before the reading of the Declaration. I’m standing at right. Faces have been blurred (except mine) to protect privacy

Tiny flower

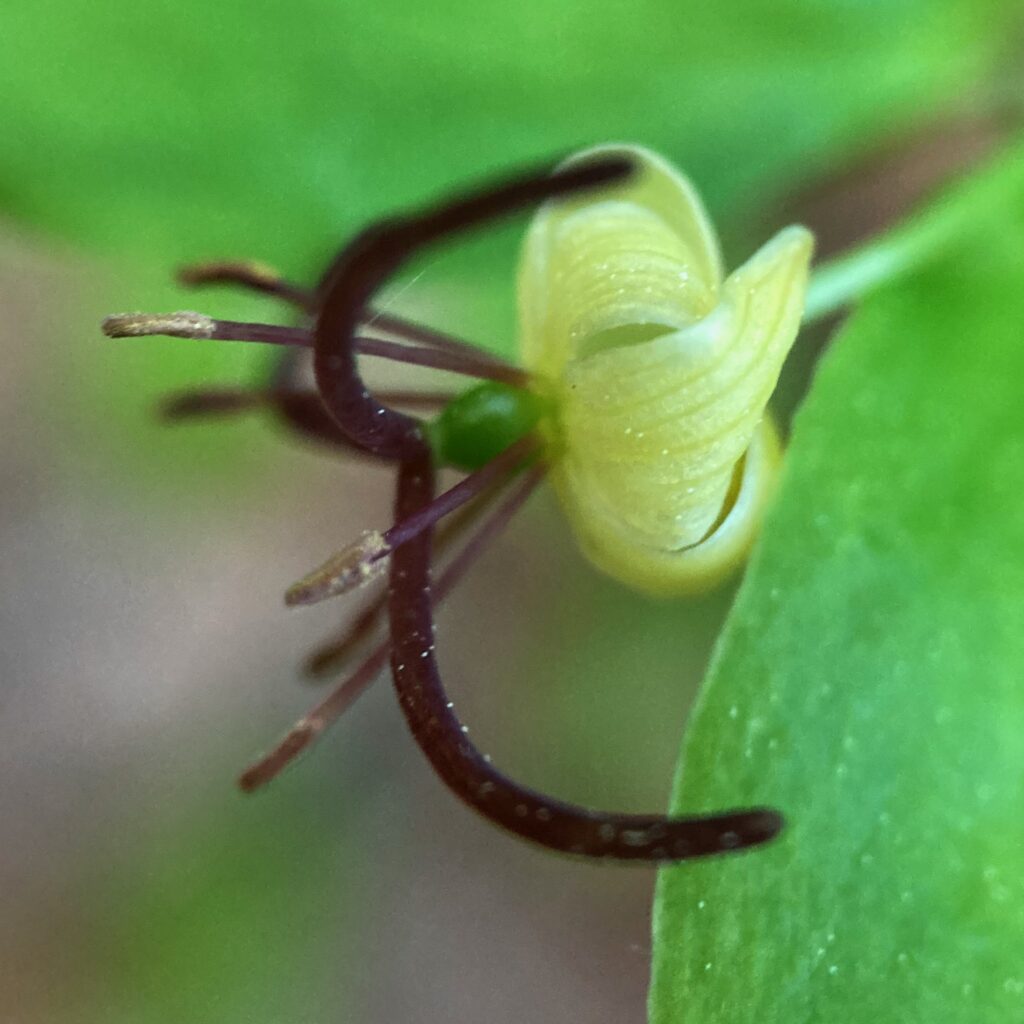
Medeola virginiana, sometimes called Cucumber Root or Indian Cucumber-root, is in bloom in the woodlands around Cohasset right now. As the name implies, the small root is crunchy and white and tastes like cucumber — but you kill the plant when you dig it up for the root, so I stopped foraging for it many years ago.

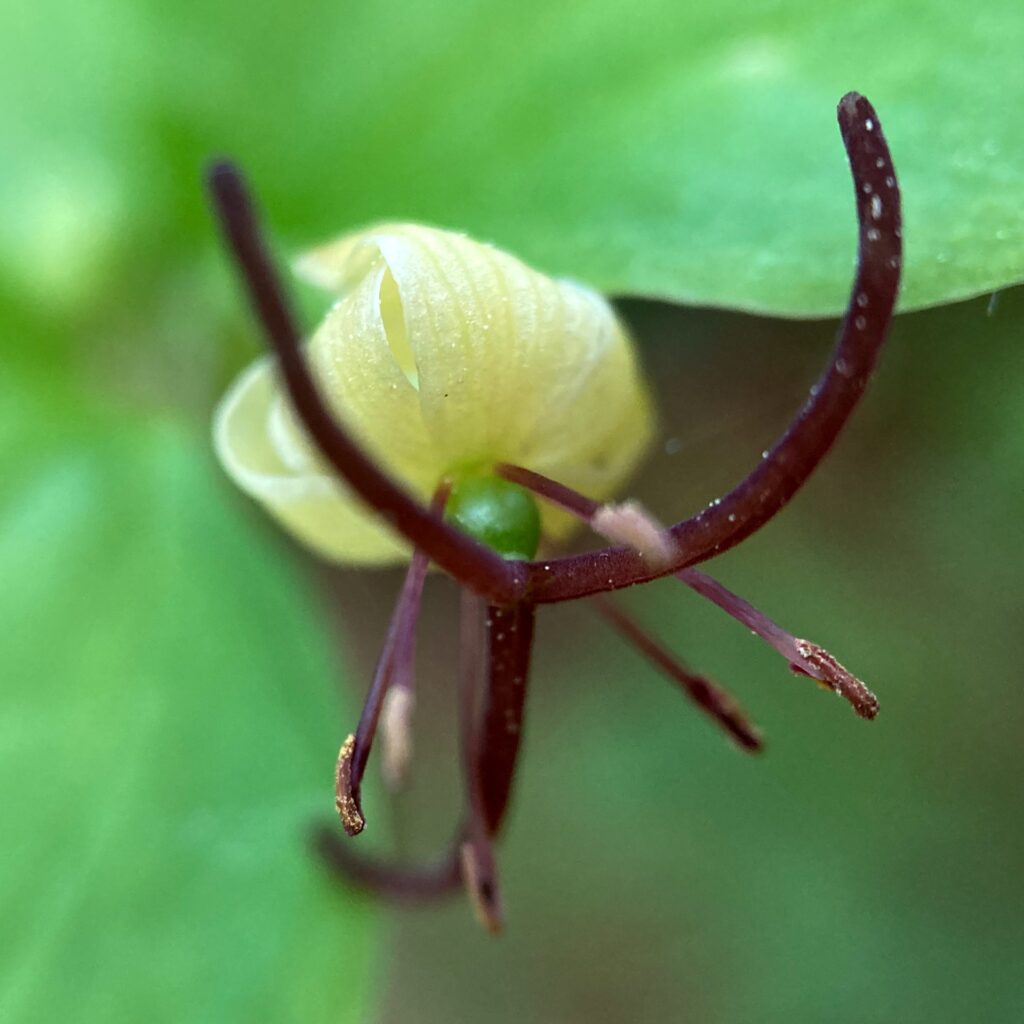
The flower is tiny, maybe a centimeter or two across. It doesn’t look like much until you look at it through a magnifier:

Close up of a tiny flower, with a deep red pistil that terminates in three parts that are longer than the petals, and with greenish-yellow petals that curl back from the ovary.
Front view of Indian Cucumber-root flower through 10x hand lens
Same flower as previous photo, but a side view.
Side view of Indian Cucumber-root flower through 10s hand lens