Non-binary gender meets arts-and-crafts…. I was trained up by old-school DREs (Directors of Religious Education) who addressed many congregational issues with arts and crafts projects and filing systems. Sure, arts and crafts and filing systems can’t address every social challenge, but you’d be surprised at what you can accomplish through simple means.
In our congregational, we’ve been thinking about non-binary gender. How do you educate people about non-binary gender? How do you make non-binary gender seem fun and interesting? If you were trained up by old-school DREs, the answer would be obvious: stickers! Stickers and a filing system for them!
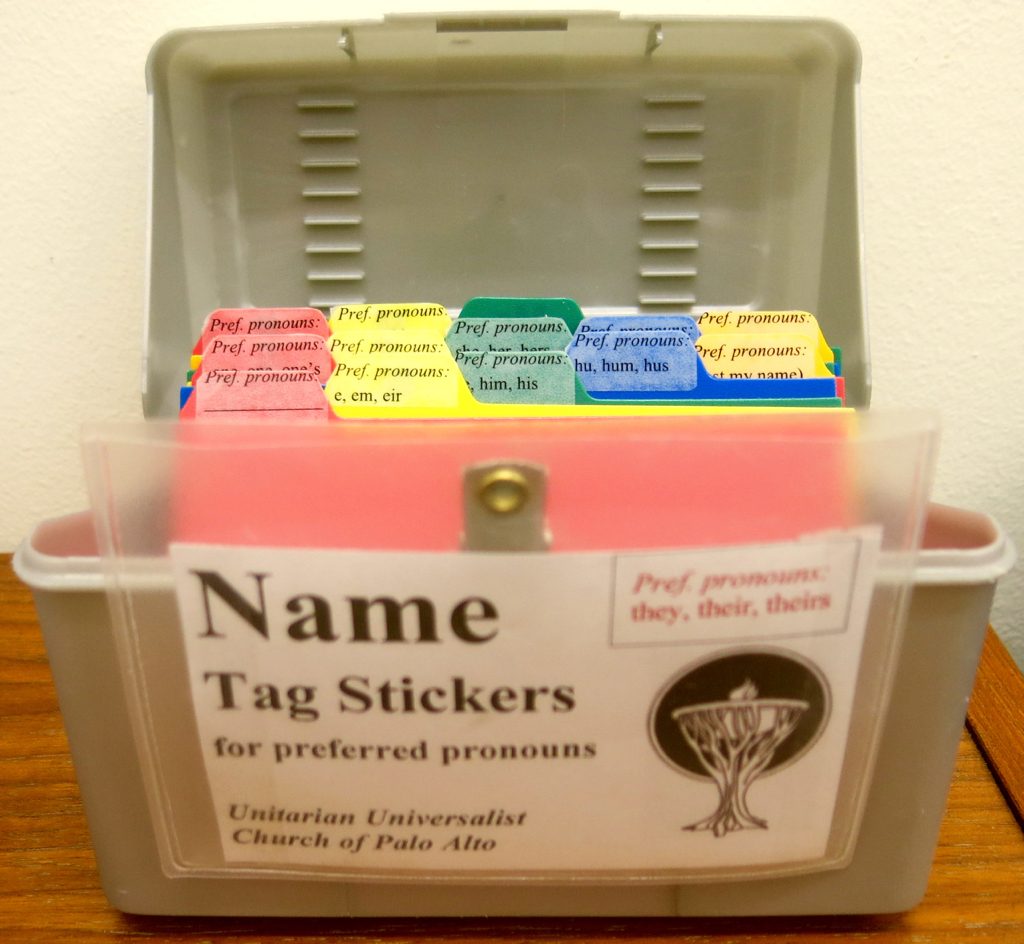
You can see my prototype above. We’re going to try it out this Sunday, though I expect a number of problems. First off, an index card file box is not the ideal storage system, and and it may not work well during real-world coffee hour. The stickers may prove to be a bit small, though I had to size them to fit on our name tags (recognizing that people who would use these might have one or more other stickers on their name tags already, e.g., rainbow sticker, UUSC sticker, etc.). And I’m sure someone will criticize my choice of personal pronoun sets (’cause we’re Unitarian Universalists, and we love to criticize each other).
Aside from the inevitable problems, I think three things will work well from the start: 1. the stickers will affirm those who don’t fit into binary gender (even if they don’t use the stickers because they don’t want to be out about it on Sunday morning); 2. the stickers will serve an educational function; and 3. everyone likes stickers!
Specifics of how I formatted the stickers are below:
I/ I came up with a dozen different choices for pronoun sets. Why a dozen? I’m just creating a prototype, so I didn’t feel a need to be absolutely comprehensive, and it was easy to fit a dozen choices onto the template I designed (which I’ll get to in a minute).
I made a (barely) educated guess that the most commonly used pronoun sets are: 1. she, her, hers; 2. he, him, his; 3. they, their, theirs; 4. one, one, one’s; and 5. people who prefer that you use their name rather than a pronoun. Then, of course, I wanted: 6. a fill-in-the-blank option. That used up six options. Then I picked pronoun sets with which I was familiar, which meant ones I know from the science fiction world (because science fiction fans have been talking about non-binary gender for fifty years or more). Then I added a couple of others that I found online. Hardly a scientific selection, but you have to start somewhere.
OK, so here’s my list of pronoun sets:
Pref. pronouns: __________ [i.e., fill in your own]
Pref. pronouns: e, em, eir
Pref. pronouns: he, him, his
Pref. pronouns: hu, hum, hus
Pref. pronouns: (just my name)
Pref. pronouns: one, one, one’s
Pref. pronouns: per, per, pers
Pref. pronouns: she, her, hers
Pref. pronouns: sie, hir, hirs
Pref. pronouns: they, their, theirs
Pref. pronouns: xe, xem, xyr
Pref. pronouns: ze, hir, hirs
II/ Looking at our congregational nametags, I figured I wanted a sticker that was about one inch wide and half an inch tall. Here’s how I printed them:
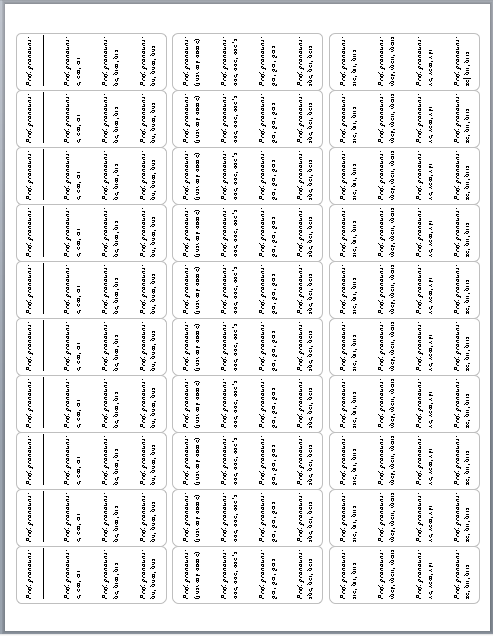
Use Avery #18660 1″ x 2-5/8″ clear labels. Download the MS Word template from the Avery Web site. Click in one of the boxes that represents a mailing label, and click Format => Text Direction; in the dialogue box, choose one of the sideways text directions. Set the font to Times New Roman 10 point. Type in “Pref. pronouns:” hit return, type in a set of pronouns, hit return again. Stop for a moment, and select that last return you just entered, and make it 16 point type. Now do this again, but this time input a different set of pronouns. Repeat with a third and fourth set of pronouns. Now select all the text that you put into that text box and copy it. Go down to the next mailing label box, change the text direction to sideways, and paste in the text you copied. Keep doing that all the way down the column of ten mailing labels.
Now go to the next column of mailing label boxes. Do the same thing again, but with four different sets of pronouns. And then again, four more sets of pronouns in the fourth column. Print the document onto a sheet of #18660 mailing labels. Now you can cut long strips of stickers out, and each strip will have the same set of personal pronouns on it. Of course, you may need a different size of sticker, in which case you’ll want a different size of mailing label; but you can follow the same basic process for a different size.
In case this seems too difficult, or if it helps you to see the end result, here’s a PDF for the stickers I made:
Personal pronoun stickers ready for printing (PDF)
III/ Next step: create a filing system. My solution was not ideal, but I used what I had on hand.
I found an old index card file box. As you can see in the photo above, you put one of the stickers onto the appropriate divider. Then fold up the long strip of stickers, and tuck it in behind the divider. At first, I tried cutting the strips into individual stickers, but they are so small they tend to get lost in the file box; the long strips are much easier to handle.
Now there’s a possible problem with the index card file box: the dividers are not attached to the bottom, and it’s easy for the strips of stickers to slide under the divider and wind up in the wrong section. I looked at a coupon organizer I had on hand, but sure enough, the dividers don’t go all the way to the bottom, so you could wind up with the same problem. If the index card file box does prove to be a problem, I’m looking at getting a dozen business card cases made of recycled paper, stored in some kind of file box.

