As a follow up to a previous post on tumbaderos — a tumbandero is the washtub bass that’s played in the Caribbean and Central America — tumbandero player Axel D. Rodríguez sent links to some fabulous videos. If you’re interested in tumbanderos or washtub bass, you’ll be fascinated by these videos, both to hear the varied playing styles, and to see helpful visual cues for making your own instrument.
Thank you Axel! (Find Axel and his band on Spotify — and on Youtube.)
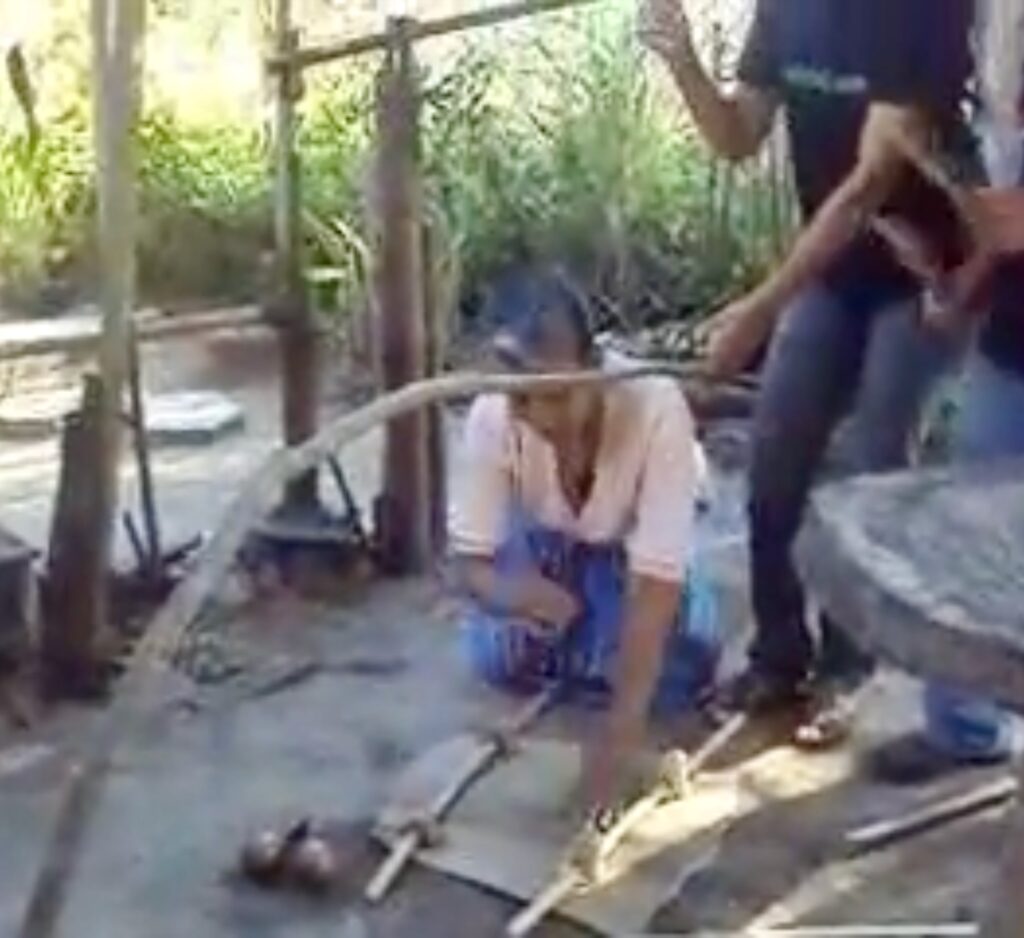
Tingo Talango — Cuba 1 — A must-watch video showing a musician building a Cuban version of the earth bow, called a “tingo tualango” or a “tumbandero.” The earth bow was the African instrument from which the washtub bass and the tumbandero are derived. Skip ahead to 2:50 to watch the building of the instrument, and then watch it being played both by plucking the single string, and playing rhythm on the soundboard. The musician frets the string rather than adjusting the tension on the bow.
Tingo Talango — Cuba 2 — A short video with someone playing the tingo talango.
Tumbandera or Kaolin — Cuba 3 — Another traditional Cuban earth bow. These musicians adjust the string tension by moving the bow, and get different notes. In the short demonstration of playing, it seems the instrument sometimes requires two musicians — one to play, and the other to adjust tension to keep the instrument on pitch.
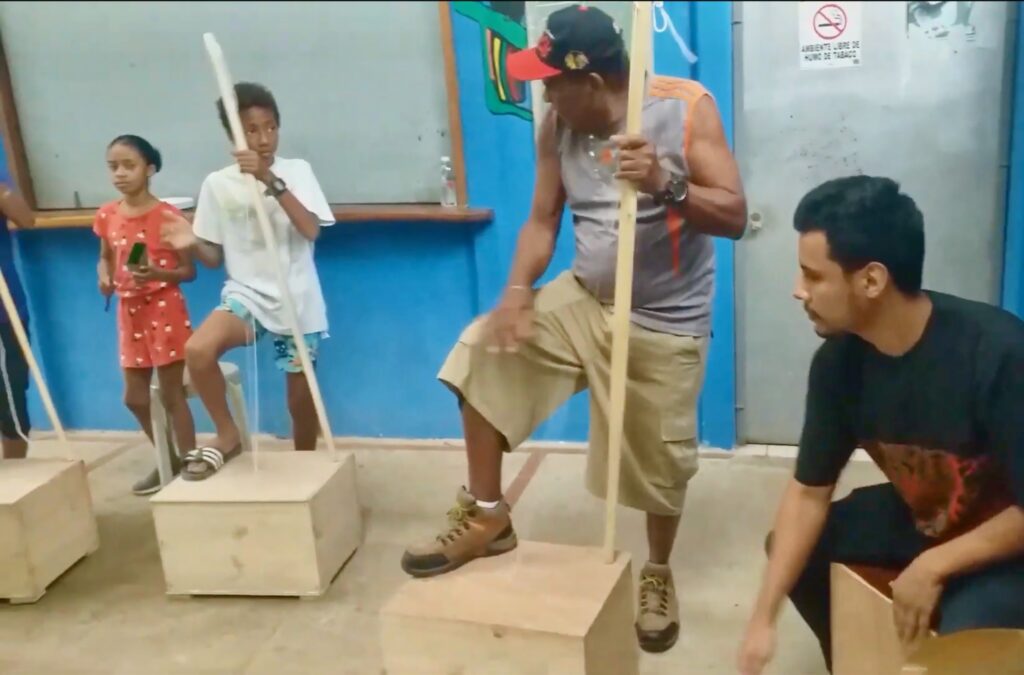
Quijongo Caribeño — Costa Rica — The visuals show some adults showing kids of about middle school age how to build an earth bow-derived instrument out of a wood box, a string, and a neck. (The audio isn’t coordinated with the visuals.)
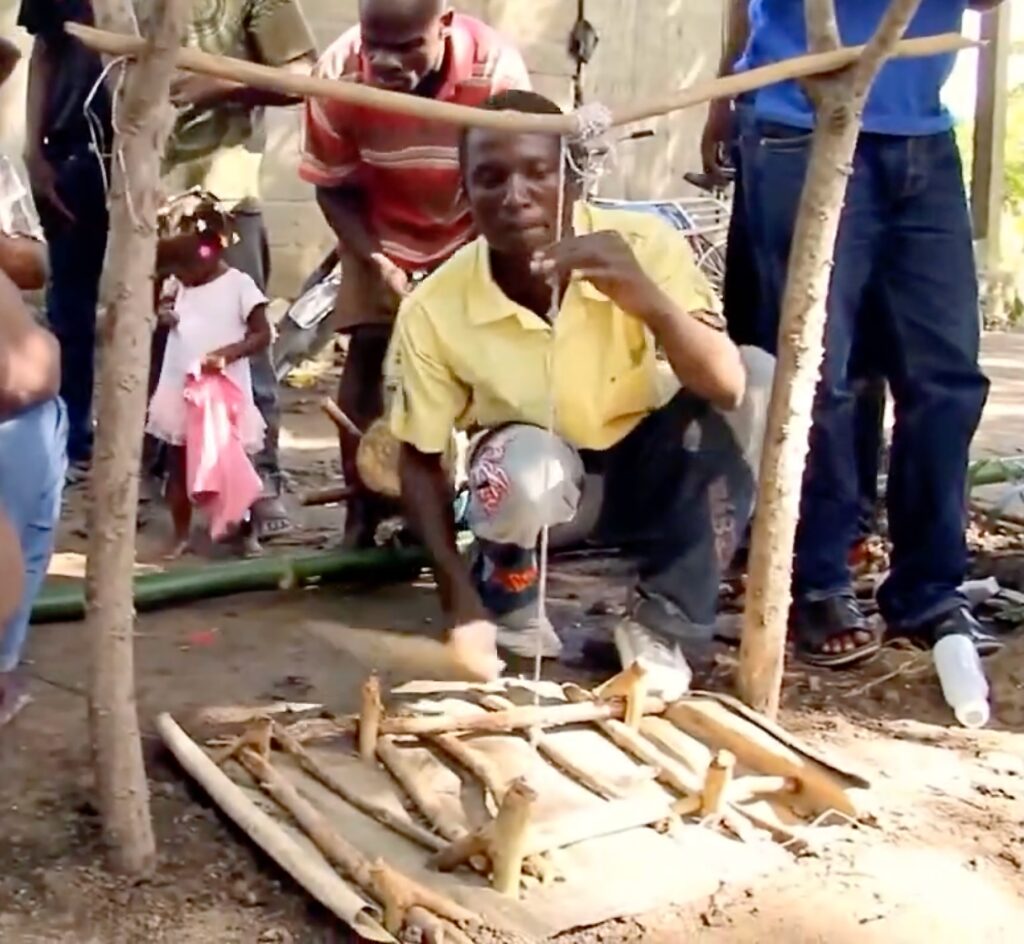
Marengwen — Haiti — An earth bow-type instrument, but the string tension is fixed, and pitch is altered by fretting. In addition, rather than plucking the string, the musicians strike the string with a stick. A must-watch video.
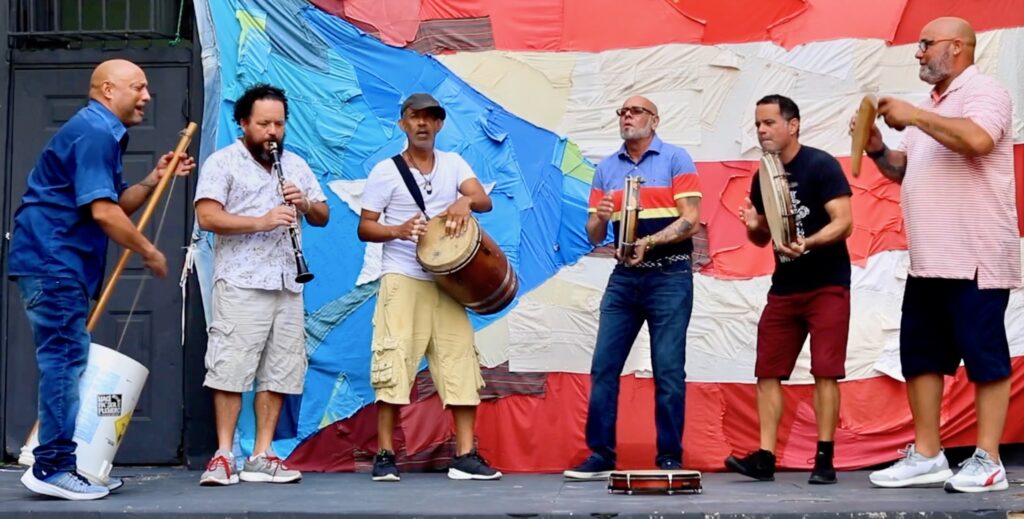
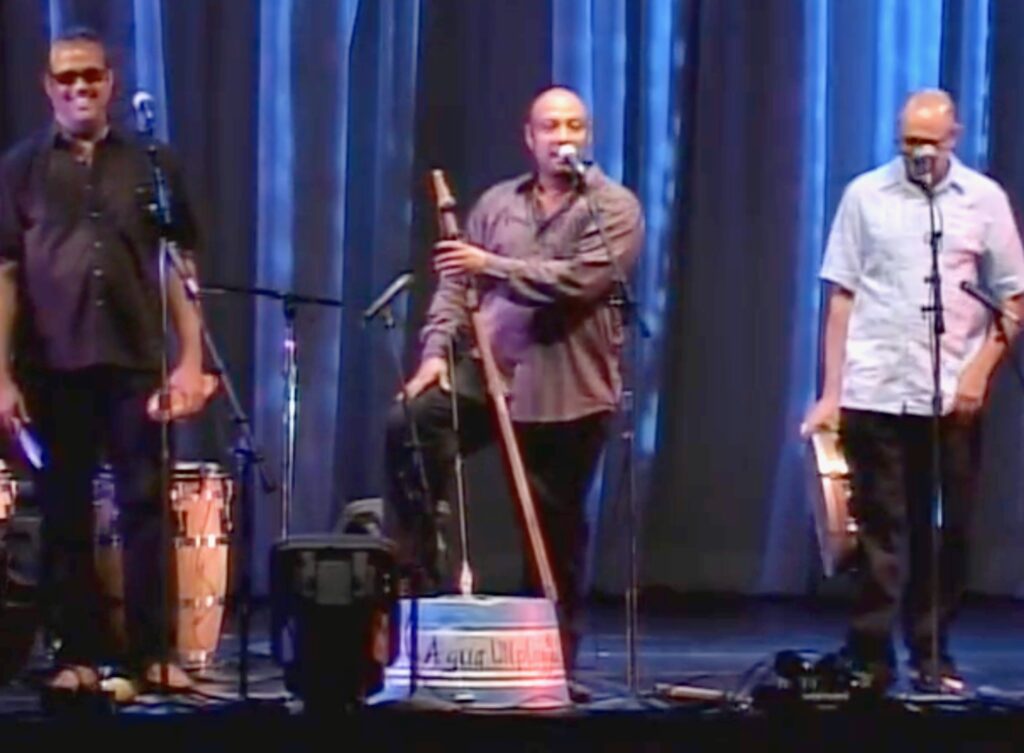
Tumbandero or Bajo De Palangana — Puerto Rico 1 — A band with a tumbandero made from a plastic five gallon bucket.
Tumbandero or Bajo De Palangana — Puerto Rico 2 — Tumbandero made from a plastic five gallon bucket. One musician playing along to a recording, with a good view of his playing technique.
Tumbandero or Bajo De Palangana — Puerto Rico 3 — The tumbandero player picks up his instrument at 0:15. This instrument appears to be metal and plastic.
Tumbandero or Bajo De Palangana — Pureto Rico 4 — Tumbandero made with a plastic five gallon bucket. Once again, the tumbandero functions more like tuned percussion than a bass. You can hear the tumbandero from 0:00 to 2:45; and from 6:15 to the end.
Tumbandero or Bajo De Palangana — Puerto Rico 5 — A Smithsonian Folkways recording. Great audio, no visuals.
Tumbandero or Bajo De Palangana — Puerto Rico 6 — A tumbandero made out of a metal washtub. The tumbandero player explains his instrument as follows:
“Wherever the African diaspora is, you are going to find some sort of instrument similar to this one. In the case of [the musical genre] la plena, it’s an instrument that is complementary to the traditional panderetas [frame drums] and guiro [hollow gourd played with wire brush]. And it sounds close to a bass [in range]. But the pitch isn’t perfect, so it’s basically another percussive instrument.”
Axel also sent some photos he found online — since I don’t know the source of them, and whether they’re copyrighted, I decided not to include them in this post. But if you do an image search for “tumbandero” you should turn up some interesting images.
A final note: I really want to make the Costa Rican instrument. I like the sound of the wood, I like the looks of it, and it would be fun to make. But we don’t have room for such a large musical instrument in our tiny apartment.